Robert is a professional journalist who’s also a freelance writer in his free time. He loves science-fiction stories and documentaries about UFO. Robert is also planning t read more
Jim Yang is our site founder. As a pro ping pong player in the past, he's also our main expert consultant. In his spare time, Jim teaches kids table tennis, goes hiking, and read more
Last updated: September 14, 2023
PingPongAcademy is reader-supported. We may earn a commission through products purchased using links on this page. Learn more about our process here
If you want to be a great table tennis player
Trusted SourceHow long/often do we practice?-TableTennisDailyI’ve heard that Asian players generally practice more than European players. It maybe so for top players, but I suspect recreational players in Europe/USA spend more hours because of the difference in lifestyle.
www.tabletennisdaily.com
, you’ll need to practice for many hours a week. However, this will mean that you will need to become familiar with blade sealing. The sealing table tennis blade process can have a dramatic effect on the longevity of your racket. When you varnish or “seal” the surface of a table tennis racket with a thin layer this lacquer adds some strength and durability. This is also helpful when you apply glue to reattach rubbers to the surface of the blade. The varnish improves the surface fiber adhesion which is crucial if you have a blade with a softer or more fragile outer layer. This will reduce the chance of splintering when you take off the older rubber to replace it with a fresh one.
Why Seal Your Table Tennis Blade?
There are four main advantages to sealing a ping pong table racket, they are:
The smoother lacquered surface of the blade makes it easier to add and remove the rubbers.
The gluing of the rubbers is smoother and easier.
The blade of your racket is less likely to splinter when the older rubber is removed.
The lacquered blade has a shiny texture that will prolong the active life significantly.
How to Seal a Table Tennis Blade?
Fortunately, sealing a table tennis blade is quite straightforward.
Tools You’ll Need
There are five main tools or items that you will need to successfully seal your tennis blade, they are:
The wooden ply table tennis racket you want to seal
A sealant and varnish kit
A clean sponge or soft cloth
A rubber chip tool to remove the old rubber surface
Some cleaning solution and warm water
Steps
Now that you have your tools and items and a clean space to work you can get to work. There are five main steps to follow in order to successfully seal your table tennis blade, they are:
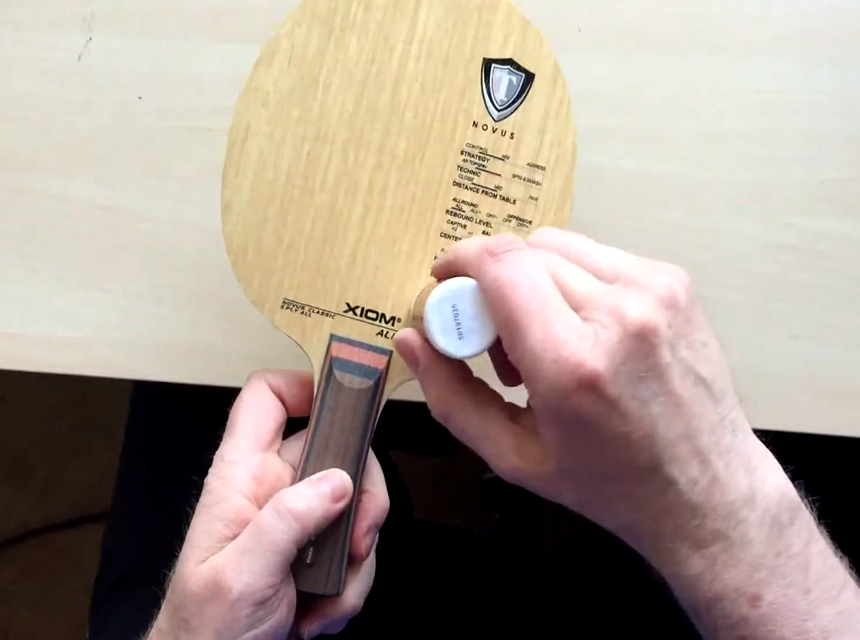
Step 1: Thoroughly Clean Your Table Tennis Racket
The surface of your racket can accumulate a thin layer of dust and dirt particles. This is especially true if you have not used the racket in a while. Another source of problems is the old sections of rubber that can be very grimy and dirty. The easiest way to remove these layers of dirt is to use the sponge or cloth and warm water
Trusted SourceSimple Ways to Clean Ping Pong Paddle Rubber: 10 StepsPing pong, or table tennis, is a fun game to play with your friends or competitively. Unfortunately, between the natural oil on your hands and the dirty ball, your paddle can get quite dirty. If the rubber on your paddle isn’t clean, it…
www.wikihow.com
. It’s tempting to dunk the paddle in the cleaning solution and water but this is the wrong approach. A gentle sponge action is more effective, removing the surface dirt and avoiding any hard scrubbing on the surface of the rubber.
If you use a cleaning solution avoid using a product that contains caustic or harsh chemicals that could damage the ply of your racket. If you need some more detailed finer cleaning you can use a soft toothbrush to get at hidden dust that could be lurking in the ply. Eventually, the racket will be clean and the rubber will begin to feel tacky. At this point it’s time to let the paddle dry naturally before continuing with the next step.
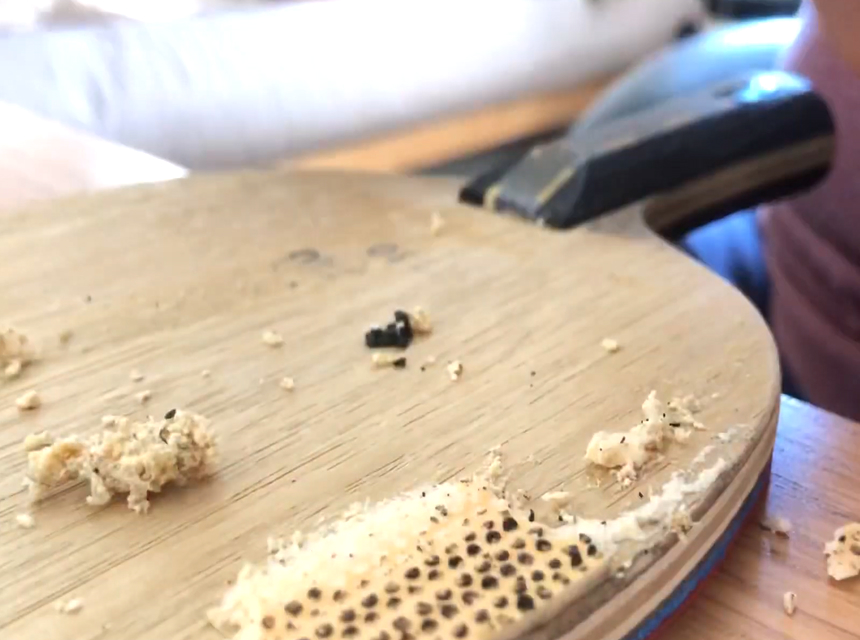
Step 2: Carefully Remove the Rubber
Removing the rubber can be a challenge, but the process is easier if you take your time and follow this advice carefully. First, take the edge tape off the circumference of the blade to get at the edges of the rubber. Next, take the rubber chip and start to loosen and peel away the outer rubber surface. As you work, the rubber chip should be tucked into the rubber edge around the racket to make it easier to peel it free. Always peel the rubber slowly for an even and smooth removal. Any revealed deposits of glue should be scraped clear along with stubborn sections of rubber. At this stage you need to clean the blade gently and then repeat this process on the opposite side. At this point your blade is prepared for sealing which we will cover next.
Step 3: Choose a Sealant
When you look for an appropriate varnish or sealing product online you may be surprised at the choice on offer. Having plenty of choices can be a good thing, but it can be overwhelming and you don’t want to choose the cheapest product. Some lower quality varnishes are not suitable for a ping pong paddle and they can even damage the racket! Some of the best products we’ve used for this purpose are the aforementioned Joola sealant, “Revolution 3” and the comprehensive “Donic Formula and Lacquer kit. These three products have excellent adhesion properties and they give your blade a shine and texture that’s easy to work with. A bottle of good sealant can be expensive, but you will get many uses out of it and it’s a sound investment if you play table tennis regularly.
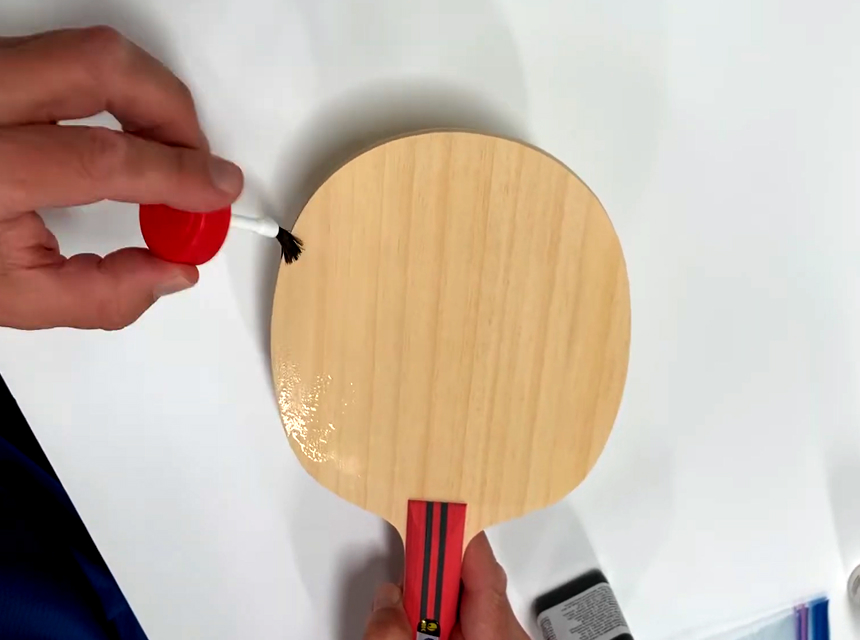
Step 4: Apply a Thin Coat of Sealer
Once you have your chosen varnish or sealant it’s time to apply a coat to your table tennis blade. First, ensure that the surface of the blade is still clean and free from dirt because this material will adhere to the coat of varnish. When sealant is mixed with dust and dirt the texture is uneven and the results are unsatisfactory. When the blade is clean, bring the paddle to a well-lit area and protect any nearby surfaces that you care about. The last thing you need is a varnish splash on your expensive dining table and taking a moment to put down some newspaper is a smart move.
When you’re ready, take the sealer bottle and slowly squeeze some sealant onto a clean and dry sponge.
Avoid soaking the sponge because it’s harder to apply and messier for your home. A light layer of sealant on the surface of the sponge is ideal and this is applied smoothly to the surface of the blade.
Apply the sealant in a circular pattern to ensure that the application is smooth and even. The sealant should spread evenly right up and then onto the edges of the blade. When you’re done, repeat this process for the opposite side and ensure that even corner, edge and space is coated.
Allow the first layer of sealant ample drying time before you decide to apply the second coat. Many sealant products have different drying times, but as a rule of thumb, at least 12 hours is a good drying benchmark. On the second application repeat the process details above and you should be able to see the lacquer soaking into the surface of the blade. As a precautionary note, it may appear that the sealant is dry after around 10 minutes, but this is not sufficient time for it to soak and dry properly. After this second application the sealing process is complete and you’re ready to move onto the final step.
Step 5: Final Cleaning
Now it’s time to give your table tennis paddle a final clean to remove any foreign particles that could be on the surface. The best method is to dust the surface with a dry clean sponge or cloth and wipe away any pieces of excess sealer. Finally, it’s time to clean the racket grip and glue the best table tennis rubber in place to complete the process.
Useful Tips
There are seven useful tips to make sealing your blade easier and more efficient, they are:
Don’t use a cheaper water-based sealant of varnish because it will damage the fibers of your paddle blade.
Reapply the sealant after every couple of rubber removals to keep the surface flat, smooth and easier to use.
Take care to avoid applying too much sealant because it makes the surface uneven and the rubber is harder to glue in-place.
When you’re removing the old rubber, peel it away smoothly and avoid jerking. Sudden movements can tear blade fibers free and cause a lot of damage.
Removing the rubber slowly and carefully at an angle will make the process easier.
The blade must be completely dry to ensure that the sealant has been fully absorbed before the new rubber is applied.
When the blade is sealed don’t leave it without a new rubber surface for too long or it will gather dust and dirt. This can make the rubber application difficult and you may be unsatisfied with the results.
Final Thoughts
Hopefully, we’ve shown that the sealing table tennis blade process will not improve the performance. But, it will make the blade more durable and future rubber applications will be far easier. If you take your table tennis playing seriously and you want to save money you can get a lot of extra life out of a sealed blade. Avoid cheaper water-based sealants and apply good quality rubbers to the cleaned and lacquered surface. The process may seem tricky, but if you go slowly and work methodically it’s pretty simple.
References
1.
How long/often do we practice?-TableTennisDaily
I’ve heard that Asian players generally practice more than European players. It maybe so for top players, but I suspect recreational players in Europe/USA spend more hours because of the difference in lifestyle.
Simple Ways to Clean Ping Pong Paddle Rubber: 10 Steps
Ping pong, or table tennis, is a fun game to play with your friends or competitively. Unfortunately, between the natural oil on your hands and the dirty ball, your paddle can get quite dirty. If the rubber on your paddle isn’t clean, it…